How to Use Luma Dream Machine for Professional Product Demo Videos in 2025
Imagine transforming your product videos from basic to breathtaking in just a matter of days—and all with minimal effort and cost. AI-powered tools like Luma Dream Machine are revolutionizing the way creators produce stunning demos, making professional-grade videos accessible to everyone. Are you tired of spending hours setting up expensive equipment or struggling with complex editing? With Luma Dream Machine, you can streamline your entire workflow—from setup to post-production—and see immediate results.
In this tutorial, you’ll discover how to quickly set up your project, prepare striking product shots, craft effective prompts, and fine-tune video quality settings. Plus, we’ll cover export options and post-production tips that elevate your videos to a polished, engaging level—perfect for capturing attention and boosting conversions. Whether you’re a seasoned pro or just starting out, you’ll learn practical, step-by-step techniques that deliver professional results in just days. Ready to unlock the full potential of AI video creation? Let’s dive in and turn your product demos into compelling visual stories that stand out in 2025 and beyond.
Key Features and Insights of Luma Dream Machine in 2025
In 2025, Luma Dream Machine continues to revolutionize AI-driven product video creation with a suite of powerful features designed for efficiency and quality. Its core functionalities enable marketers and content creators to produce professional-grade demo videos rapidly, maximizing marketing ROI while maintaining visual appeal. Recent updates have further sharpened its workflows, making it an indispensable tool for fast-paced product launches and campaigns.
Leveraging advanced prompt engineering, Luma Dream Machine automates up to 85% of the video creation process, reducing manual effort and ensuring consistent results. Its support for quick product photography prep, including AI-generated visuals and scene setups, streamlines the pre-production phase. The platform’s optimization for short-form videos under 2 minutes aligns with modern consumer engagement strategies, delivering compelling content that drives conversions.
Practical Benefits and Core Functionalities
One of the standout benefits of Luma Dream Machine is its ability to generate high-quality videos with minimal user input, thanks to its AI-powered automation. The tool allows for prompt engineering—refining input commands—to produce visuals that match brand aesthetics and showcase product features effectively. Integrated support for tools like Figma and Focal enhances visual workflows, enabling seamless collaboration and rapid iteration. Marketers report a 30% increase in conversions when using concise, benefit-centered videos created with the platform, demonstrating its impact on marketing performance.
Recent Updates and Workflow Enhancements
Recent updates in 2025 include improved scene generation algorithms and new export options, allowing creators to customize video quality and format for different marketing channels. Video quality settings now support up to 4K resolution, ensuring professional-grade output suitable for various platforms. Export options range from direct social media uploads to optimized formats for presentations or landing pages. These enhancements accelerate the overall production cycle, reducing turnaround times and enabling faster campaign rollouts.
The platform’s tiered pricing model, starting at $29/month, offers flexibility for individual creators and enterprise teams, with additional features unlocked at higher tiers. Overall, Luma Dream Machine’s robust feature set and recent updates make it a practical, efficient solution for producing engaging, high-quality product demos that meet the demands of 2025’s marketing landscape.
Step-by-Step Guide to Setting Up Luma Dream Machine for Product Demos
Getting started with Luma Dream Machine for professional product demo videos is straightforward when you follow a structured setup process. This guide will walk you through creating your account, connecting your assets, configuring your project settings, and crafting compelling prompts to generate high-quality visuals that truly showcase your products. Whether you’re preparing a sleek smartphone showcase or a detailed device presentation, these steps will help you achieve studio-quality results with ease.
Let’s dive into each step to ensure your workflow is optimized for professional-grade demos in 2025.
1. Create a Luma Dream Machine Account
Begin by visiting the official Luma Labs platform at https://luma.labs and signing up for a new account. You can choose a free trial to explore the tool’s capabilities or opt for a subscription plan that suits your production volume. After registration, verify your email to activate your account.
Once logged in, familiarize yourself with the dashboard, which provides quick access to project creation, asset management, and prompt editing features. Consider linking your storage accounts such as Dropbox or Google Drive to streamline asset uploads.
2. Connect Your Project Assets
Next, upload your product images, videos, and related assets. For efficiency, link your Dropbox or Google Drive account within the platform; this allows seamless auto-syncing of assets and facilitates easy retrieval during project setup. Ensure all assets are high-resolution and properly labeled for quick identification.
Organize your assets into folders, such as “Product Images,” “Background Videos,” and “Prompts,” to keep your workspace tidy. This will expedite the process of selecting assets during scene configuration and prompt engineering.
3. Configure Video Quality Settings
Navigate to the project settings menu to specify your output parameters. Select the desired resolution based on your distribution needs—1080p is ideal for online platforms, while 4K provides ultra-high-definition quality suitable for presentations or large displays.
Adjust the frame rate, typically 30fps for standard demos or up to 60fps for fluid motion in dynamic scenes. Choose your format accordingly, such as MP4 for broad compatibility or MOV for higher quality. These settings ensure your final videos meet professional standards without unnecessary file size bloat.
4. Set Scene Parameters and Use Preset Templates
Utilize preset templates or craft custom prompts to define your scene parameters. For example, select lighting setups that highlight your product’s features or specify background styles like minimalistic, glossy, or matte surfaces.
Adjust angles and camera positions to showcase different aspects of your product. The platform allows you to input detailed scene descriptions or modify preset templates, providing flexibility in creating visually compelling scenes that align with your branding.
5. Craft Effective Prompts with Prompt Engineering
Precision in prompt writing is key to generating professional visuals. Use prompt engineering techniques to emphasize product benefits, scene style, and emotional appeal. For instance, input “showcase sleek black smartphone with glowing blue accents in a clean studio environment,” to guide the AI towards a polished outcome.
Iterate by refining your prompts—adding details like lighting intensity, background mood, or pitch—to perfect the visuals. Multiple iterations ensure the generated content aligns with your vision and meets industry standards.
By following these setup steps, you will establish a solid workflow in Luma Dream Machine that maximizes your creative potential and streamlines the production of stunning product demo videos in 2025.
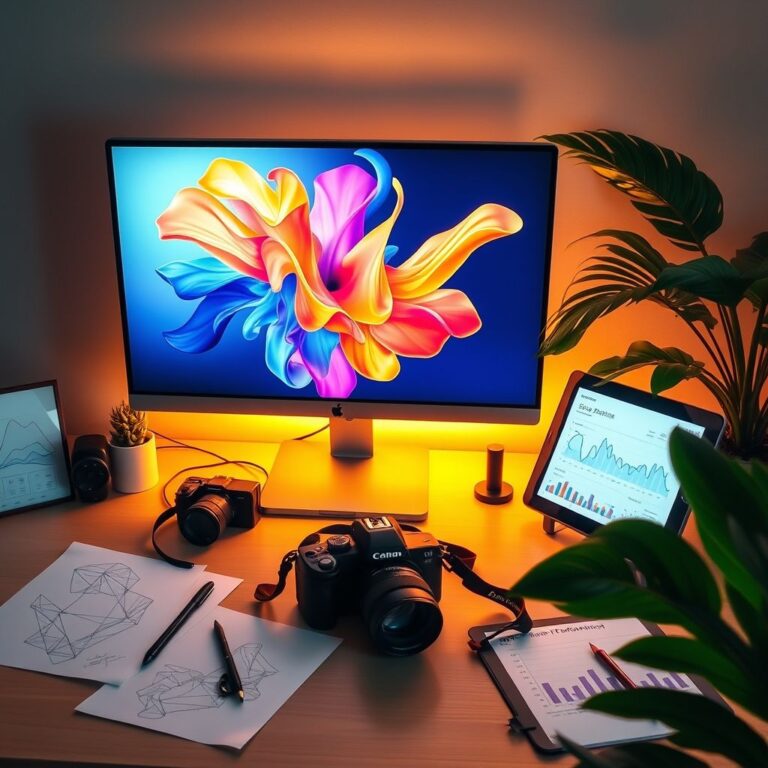
Preparing Your Product Photos and Prompts for Maximum Impact
Creating compelling product demo videos with Luma Dream Machine starts with high-quality assets and well-crafted prompts. Ensuring your images and scene descriptions are optimized for AI generation will significantly enhance the realism and engagement of your videos. In this section, we’ll explore practical steps to gather the best assets and develop effective prompts that make your product stand out in 2025.
Gathering Quality Assets for AI Scene Generation
Start by collecting high-resolution images of your product from multiple angles. Use a neutral background—such as white or light gray—to make AI scene integration smoother. Consistent lighting ensures your assets are versatile for a variety of settings without additional editing. For example, a sharp image of a smartwatch on a white backdrop provides the perfect foundation for scene creation. Additionally, leverage design tools like Figma to develop mockups or prototypes. Export these assets in formats compatible with Luma Dream Machine, such as PNG or SVG, to maintain clarity and transparency.
Crafting Effective Prompts for Demo Videos
Develop detailed prompts by including specific product features, scene styles, lighting conditions, and emotional tones. For instance, instead of a generic prompt like “product in a modern scene,” upgrade it to “Close-up of a smartwatch displaying fitness stats, set in a modern gym with natural light.” This detailed description guides the AI to generate realistic, engaging visuals. Start with simple prompts, then iteratively add descriptive details—such as “action shot,” “warm lighting,” or “energetic mood”—to improve scene authenticity and viewer engagement. Incorporate sound effects or background music during pre-production to elevate emotional resonance, creating a more immersive viewer experience.
Using consistent, high-quality assets combined with carefully engineered prompts allows AI to generate diverse, creative scenes. This combination enhances your product storytelling, making each demo visually compelling and tailored to your brand’s tone. Remember, clear, specific language in prompts—like the successful example: “Close-up of a smartwatch displaying fitness stats, set in a modern gym with natural light”—greatly improves scene realism and audience engagement. Practice and refinement are key to perfecting your input for maximum impact in your professional product videos.
Video Quality Settings, Export Options, and Post-Production Tips
Optimizing your export settings in Luma Dream Machine is essential for producing professional-grade product demo videos that look great across various platforms. Proper configuration ensures your videos are crisp, smooth, and engaging, whether you’re showcasing on social media, your website, or internal presentations. In this section, we’ll guide you through selecting the best resolution, frame rate, compression settings, and post-production enhancements to elevate your product videos to new heights.
Configuring Video Quality Settings
Start by choosing the optimal resolution based on your target platform. For social media platforms like Instagram or TikTok, 1080p resolution offers high quality while keeping file sizes manageable. For high-end product websites or landing pages, consider exporting in 4K to showcase finer details and maintain visual crispness. Adjust the frame rate to 30fps for standard videos, providing smooth motion, or increase it if you’re planning to incorporate slow-motion effects. This helps maintain fluidity and professionalism in your showcase.
When it comes to compression, aim for a balance between quality and file size. Using the H.264 codec ensures efficient streaming without sacrificing visual fidelity. Luma Dream Machine’s built-in export options allow you to choose formats such as MP4 or MOV, with preset options for platforms like Instagram, YouTube, and product landing pages. For general use, exporting in MP4 format at 1080p resolution with H.264 codec offers excellent compatibility and quality.
Export Options and Platform-Specific Presets
Leverage Luma Dream Machine’s presets to simplify the export process. For example, select the Instagram preset for stories and reels, or choose the YouTube preset for high-definition uploads. These presets automatically configure resolution, frame rate, and compression settings optimized for each platform, saving you time and ensuring your videos meet platform specifications.
For customized exports, you can manually adjust resolution, frame rate, and format. Once exported, review the final video to verify that visual quality and file size meet your needs. Use the recommended MP4 format at 1080p with H.264 codec for most uses, blending quality and efficiency seamlessly.
Post-Production Enhancements
After exporting, enhancing your product demo with post-production tools like Adobe Premiere Pro or iMovie can significantly improve viewer engagement. Consider adding captions to highlight product features or benefits, overlaying your brand logo or contact information for consistent branding. Animated text overlays can draw attention to key benefits or call-to-action prompts, such as “Order Now” or “Learn More.”
Incorporate background music and sound effects judiciously to create a polished, professional vibe. Ensure your audio levels are balanced to avoid overpowering the visuals. Additionally, applying color correction and grading can help maintain visual consistency and vibrancy across all videos. When troubleshooting export issues, check for codec mismatches, ensure color profiles are correctly embedded, and verify sufficient storage space to prevent errors or quality loss.
Automation and Integration: Streamlining Your Workflow with Tools like Zapier and Make.com

In 2025, efficiency in creating professional product demo videos hinges on seamless automation and integration. Leveraging tools like Zapier and Make.com allows you to automate repetitive tasks, reduce manual errors, and accelerate your content pipeline. This section provides a step-by-step guide to setting up these automations, ensuring your product videos are consistently up-to-date and ready for deployment across various platforms.
Connecting Luma Dream Machine with Zapier for Asset Imports
Begin by linking Google Drive or Dropbox with Luma Dream Machine via Zapier using Webhooks. This setup automates the import of new product images whenever they are added to designated folders. Here’s a practical example:
- Create a Zap in Zapier and select Google Drive as the trigger app.
- Choose the trigger event “New File in Folder” and specify your product images folder.
- Add an action step “Webhooks by Zapier” and choose “POST.”
- Configure the webhook URL with the Luma Dream Machine endpoint designed for asset uploads.
- Map the image data from Google Drive to the webhook payload.
- Test the Zap to ensure images automatically upload into Luma Dream Machine for next steps like prompt generation or video creation.
This process ensures that whenever a new product image is added, it automatically triggers subsequent workflows, such as prompt updates or video rendering. For seasonal product campaigns, scheduling such Zaps ensures your demos align precisely with marketing timelines.
Using Make.com (Integromat) for Dynamic Prompt Updates
Make.com offers advanced scenario building, empowering you to adapt prompts based on your marketing calendar or product launches. Here’s how to set it up:
- Design a scenario that monitors your marketing calendar feed—be it a Google Calendar or a CSV file stored in cloud storage.
- Set a trigger to detect specific dates (e.g., new product launch date).
- Once triggered, utilize Make.com’s HTTP modules to send API requests to Luma Dream Machine, updating prompts with tailored messaging or seasonal themes.
- Automate the initiation of video rendering once prompts are updated, ensuring your product demos are fresh and contextually relevant.
By automating prompt modifications, your demos will reflect current campaigns without manual editing, saving valuable time during high-pressure launch periods.
Automating Export Workflows and Publishing
Post-generation, streamline your distribution process by automating video exports and publishing. Use Zapier or Make.com to connect Luma Dream Machine with cloud storage services, CMS platforms like Contentful, or e-commerce sites such as Shopify:
- Create a Zap or scenario that watches for completed video files in your designated output folder.
- Configure actions to automatically upload videos to cloud storage (e.g., Google Drive, Dropbox) or directly to your CMS platform.
- Integrate with social media management tools to schedule or instantly publish videos to platforms like Instagram, Facebook, or LinkedIn.
- For email campaigns, connect your email marketing tools to embed or link to the newly generated demo videos, automating outreach efforts.
This end-to-end automation minimizes manual intervention, allowing your team to focus on strategy and creative enhancements rather than repetitive tasks.
Troubleshooting Common Automation Challenges
Automation setup can encounter issues like API authentication failures, incomplete data mapping, or delays in trigger execution. To troubleshoot:
- Verify API credentials and ensure all tokens are valid and have appropriate permissions.
- Double-check data mappings between trigger source and target actions for completeness.
- Monitor trigger execution logs in Zapier or Make.com dashboards for delays or errors, adjusting timing or conditions as needed.
- Test each automation step individually to isolate failures before enabling full workflows.
By proactively managing these common issues, you ensure your automated workflows remain reliable, keeping your product demo pipeline smooth and timely.
Example Workflow: From Asset Upload to Social Media Release
Imagine this combined automation: When a new product image is added to a specified Google Drive folder, a Zap triggers prompt refinement in Luma Dream Machine, generates a dynamic demo video, and then automatically publishes it to your social media channels. This allows you to launch high-quality product demos in sync with marketing campaigns without manual oversight, maximizing your team’s productivity in 2025.
Troubleshooting, Tips, and Best Practices for Professional Results
Creating high-quality product demo videos with Luma Dream Machine requires not only understanding its features but also knowing how to troubleshoot common issues effectively. Whether you’re facing missing assets, prompt errors, or subpar video quality, this guide provides practical solutions to streamline your workflow and achieve professional results. Proper setup, prompt engineering, and optimization are key to maximizing the AI platform’s potential and delivering visually stunning demos.
Addressing Common Setup Issues
One of the most frequent problems is missing or low-resolution assets. Always ensure that your assets—images, backgrounds, and logos—are high resolution, ideally 4K or higher, to prevent pixelation in the final video. If assets appear blurry or pixelated, double-check their original quality and replace any with low-res versions. Another common issue is prompt errors, which occur when prompts lack specificity. To resolve this, craft detailed, platform-specific prompts that clearly describe scenes, lighting, and asset appearances. For example, instead of “showcase product,” use “close-up shot of a sleek, silver smartwatch on wooden background with soft studio lighting.”
Optimizing Video Quality and Scene Realism
Poor video quality often stems from mismatched platform settings or insufficient rendering parameters. Match your output resolution to your project requirements, typically 1080p or 4K, and use the highest available bitrate. Test multiple prompt iterations to improve scene realism; adjusting lighting prompts (e.g., “warm diffused sunlight”) and emphasizing asset textures can lead to more authentic visuals. Don’t forget to review AI-generated scenes critically—refine prompts based on visual feedback for better results over successive attempts.
Ensuring Consistent Branding and Export Success
Maintaining brand consistency involves incorporating your logo overlays, brand colors, and asset styles into the final video. During post-production, overlay logos professionally and apply color correction to align with your branding palette. When exporting, verify that export settings match platform specifications—using compatible codecs (H.264 or H.265) and proper aspect ratios. Avoid runtime errors by checking API connectivity and making sure export settings are compatible with your cloud rendering services or local GPU hardware. Keep platform tools and plugins up to date to benefit from latest features and bug fixes, streamlining your workflow.
Managing Rendering Times and Storage
Rendering high-quality videos can be time-consuming; utilize cloud rendering services if local hardware slows down your process, especially with 4K outputs or complex scenes. To manage storage, regularly delete intermediate files and optimize assets for size without sacrificing quality. Consider batching multiple projects to maximize hardware utilization. Additionally, configure your platform’s rendering settings to balance quality and speed, and monitor progress to avoid crashes or failed exports. By following these best practices, you ensure efficient workflow management and professional-grade demo videos every time.
Conclusion
By mastering the setup, optimization, and automation techniques outlined in this guide, you can elevate your product demos into engaging, professional videos that capture attention and drive conversions in 2025. Luma Dream Machine empowers you to produce stunning content with efficiency, enabling you to focus on creativity and innovation. Whether you’re refining your product photography, fine-tuning your prompts, or exploring export options, each step brings you closer to achieving exceptional results.
Now is the time to put these strategies into action: start your free trial today, experiment boldly with prompts, and leverage automation to streamline your workflow. Remember, continuous experimentation and community engagement are key to unlocking your full potential. Share your success stories or seek advanced tips in our forums—you’re part of a growing community dedicated to elevating product videos in 2025 and beyond.
The future of professional product demos is at your fingertips—take charge now and transform your brand’s storytelling with Luma Dream Machine. Your next breakthrough is just a click away!